hydraulic

How to Repair a Hydraulic Cylinder?

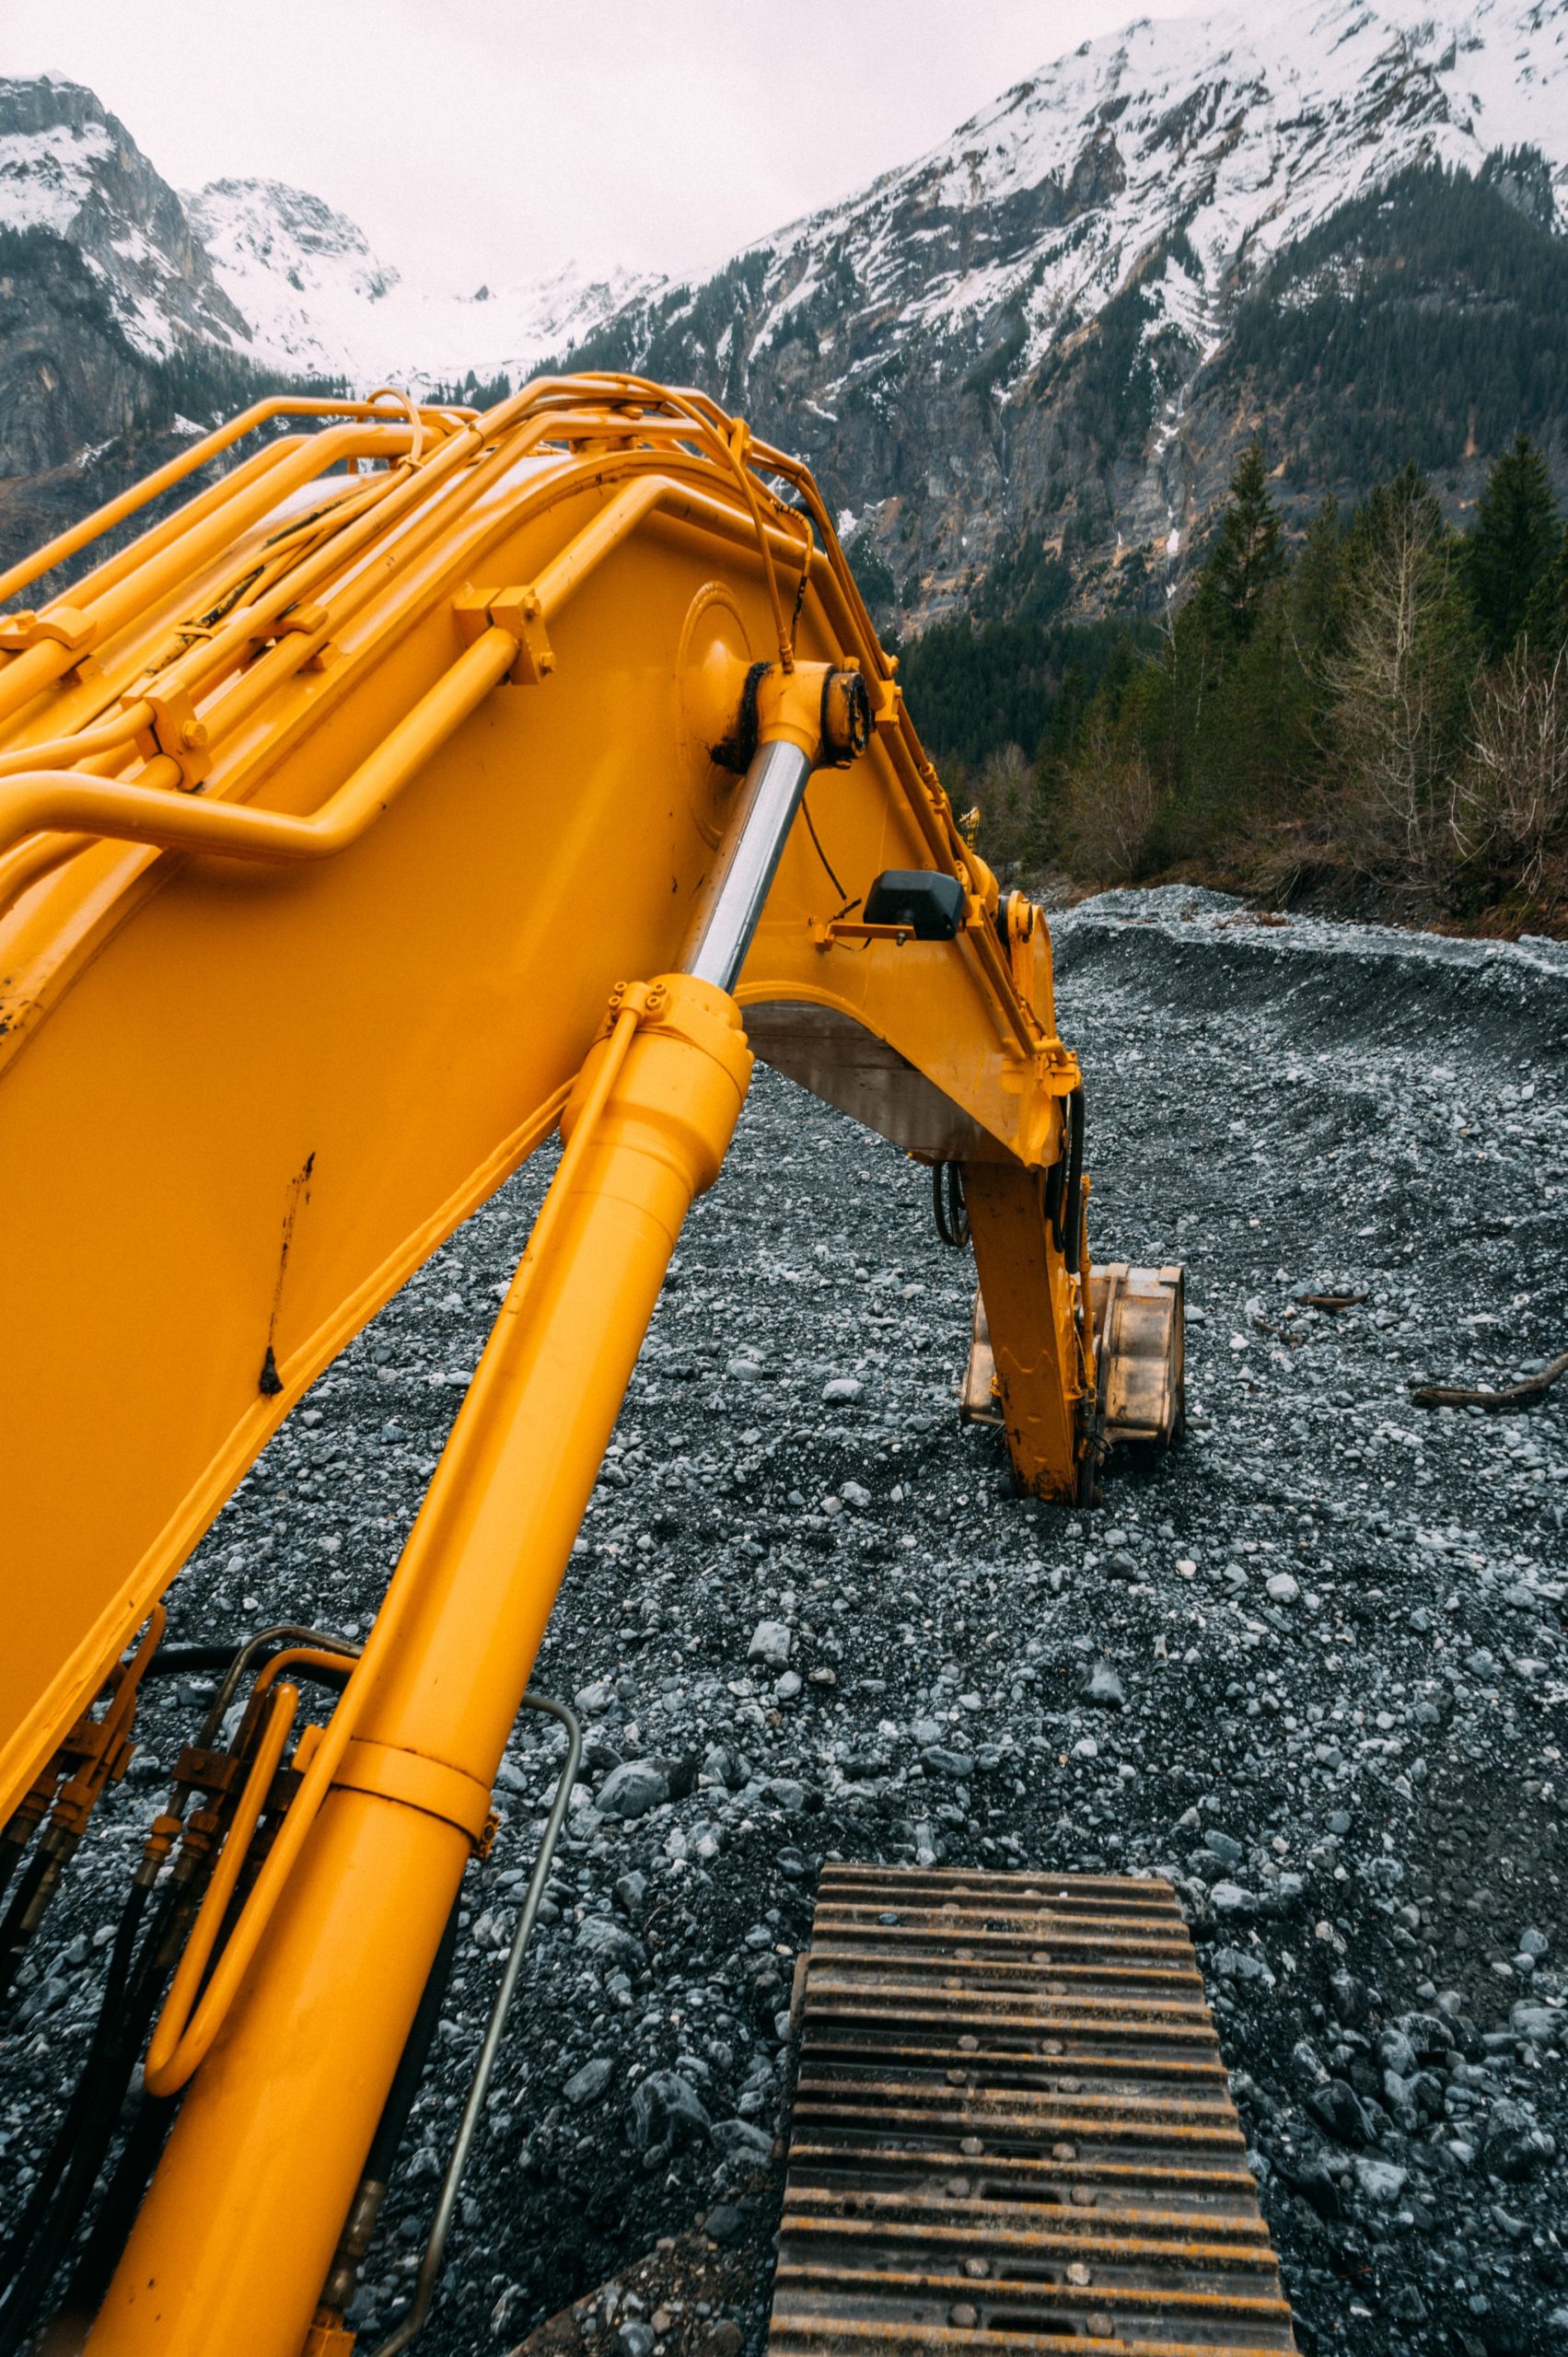
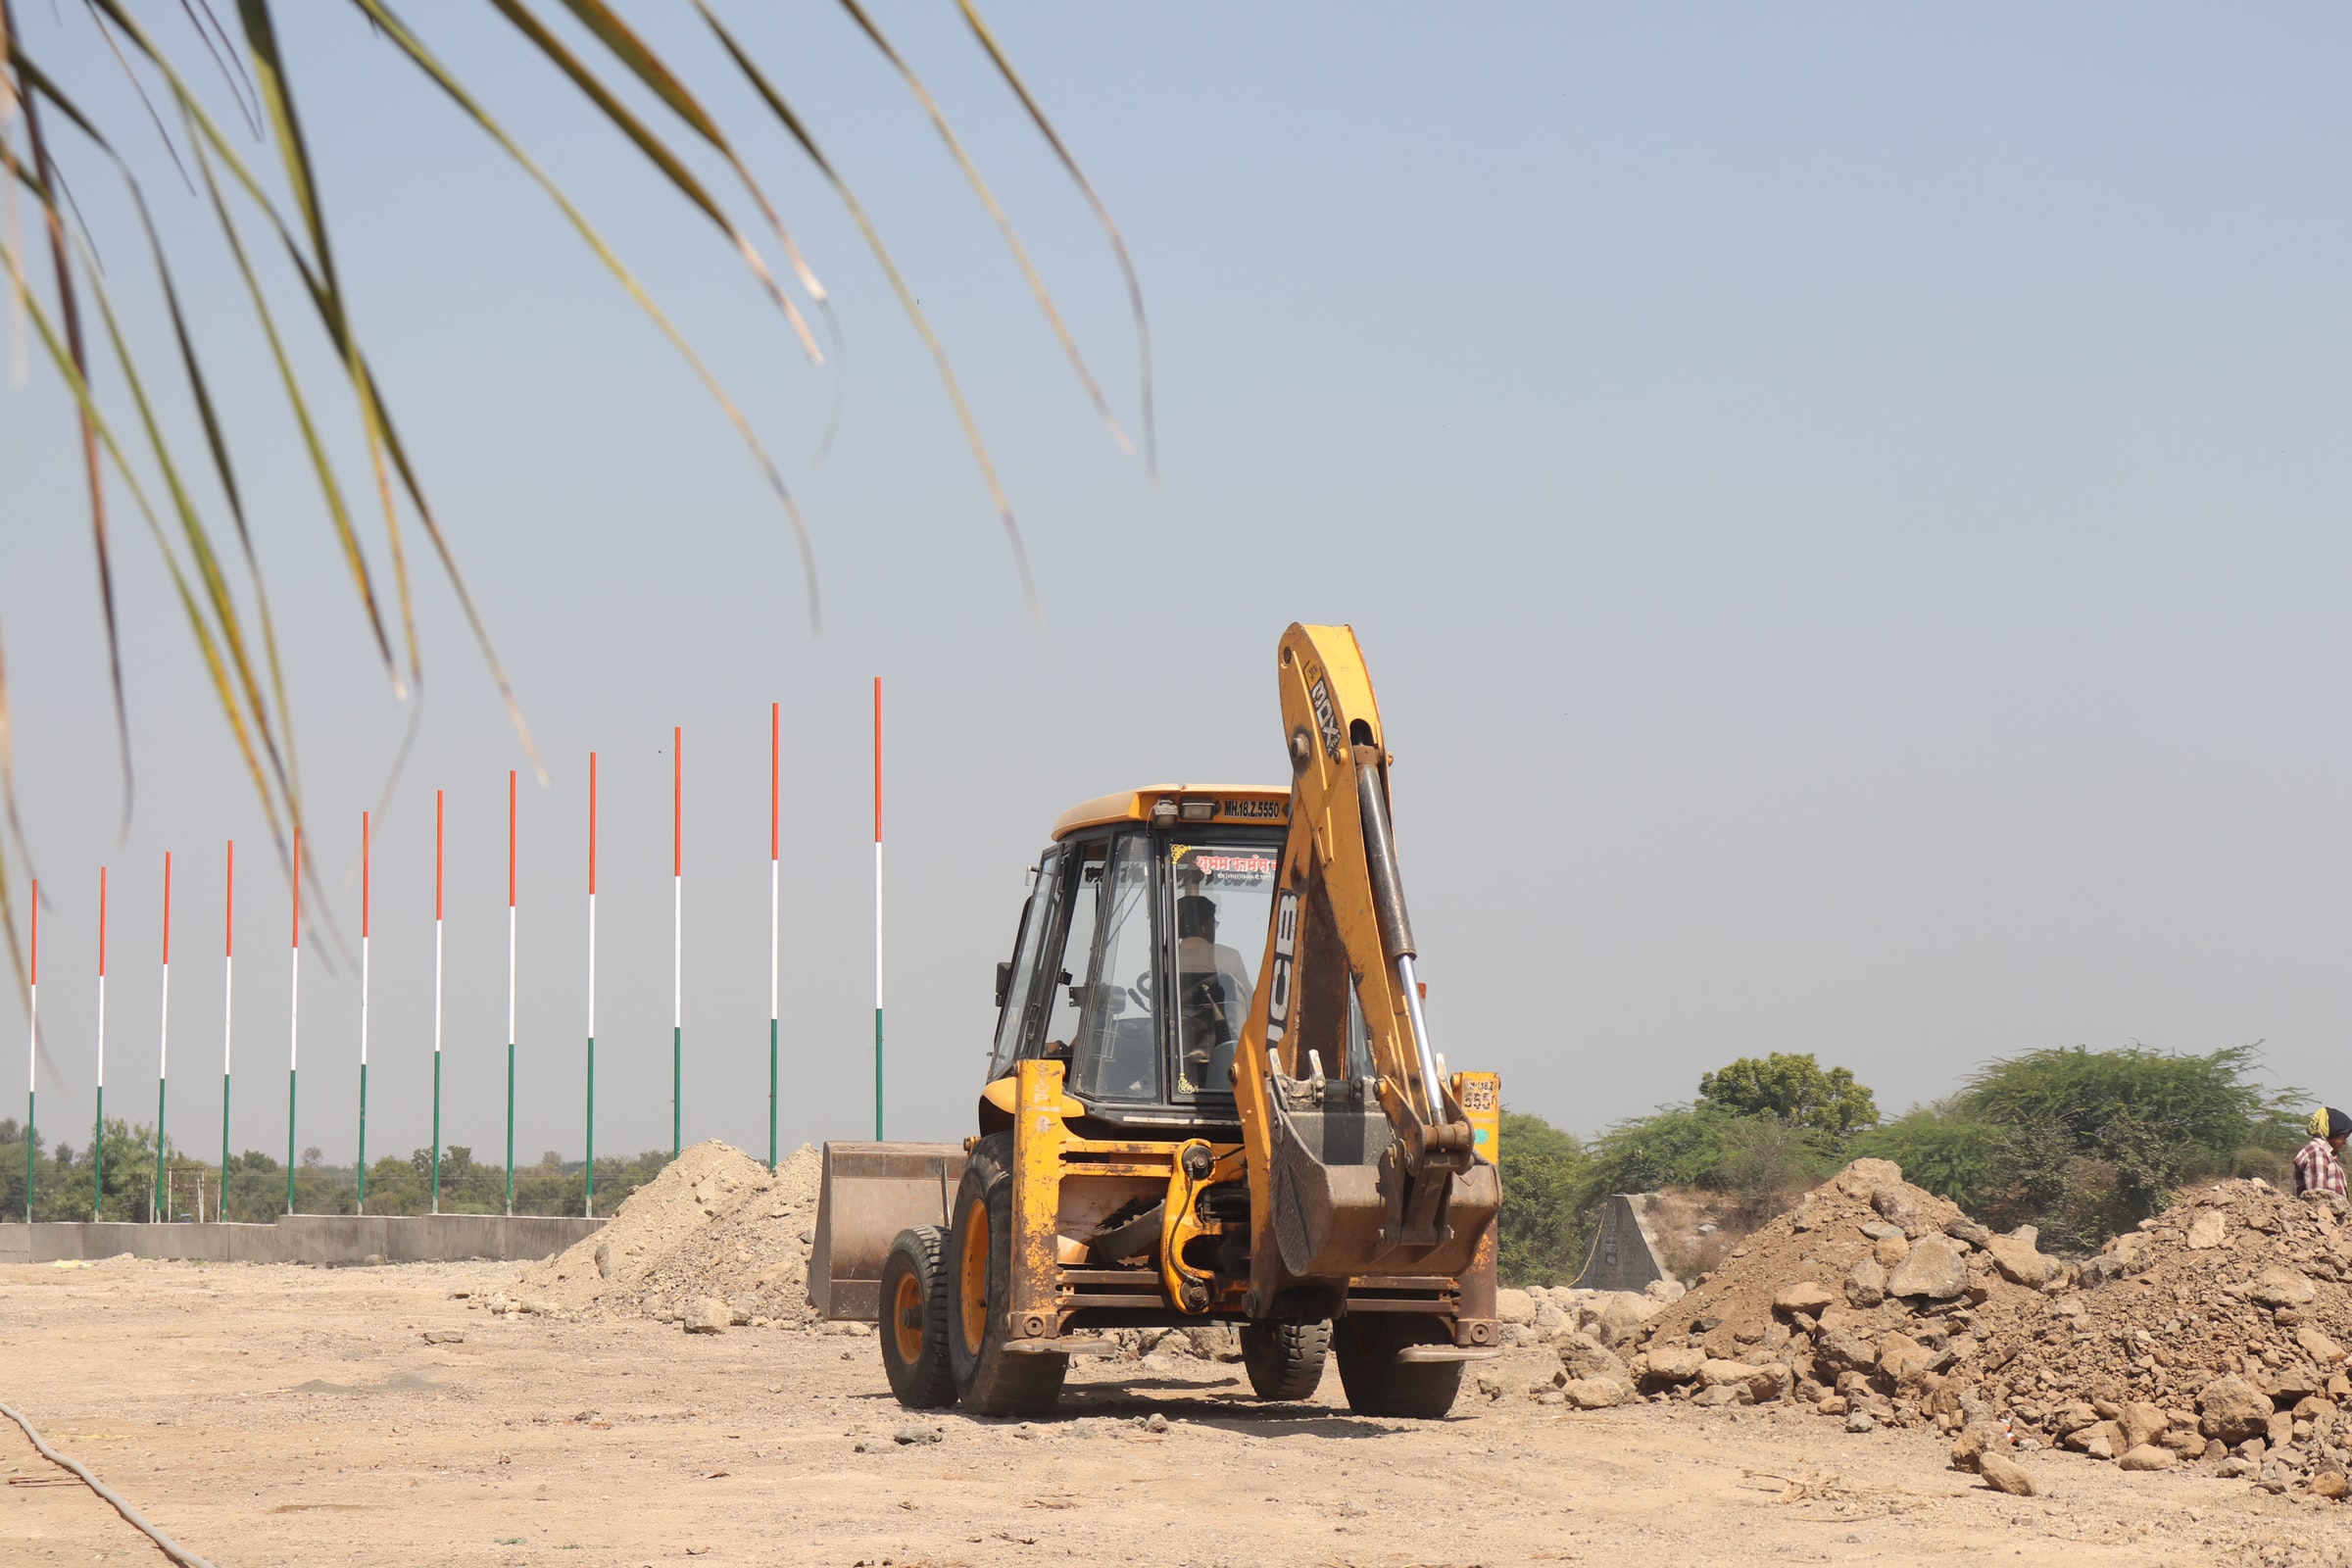
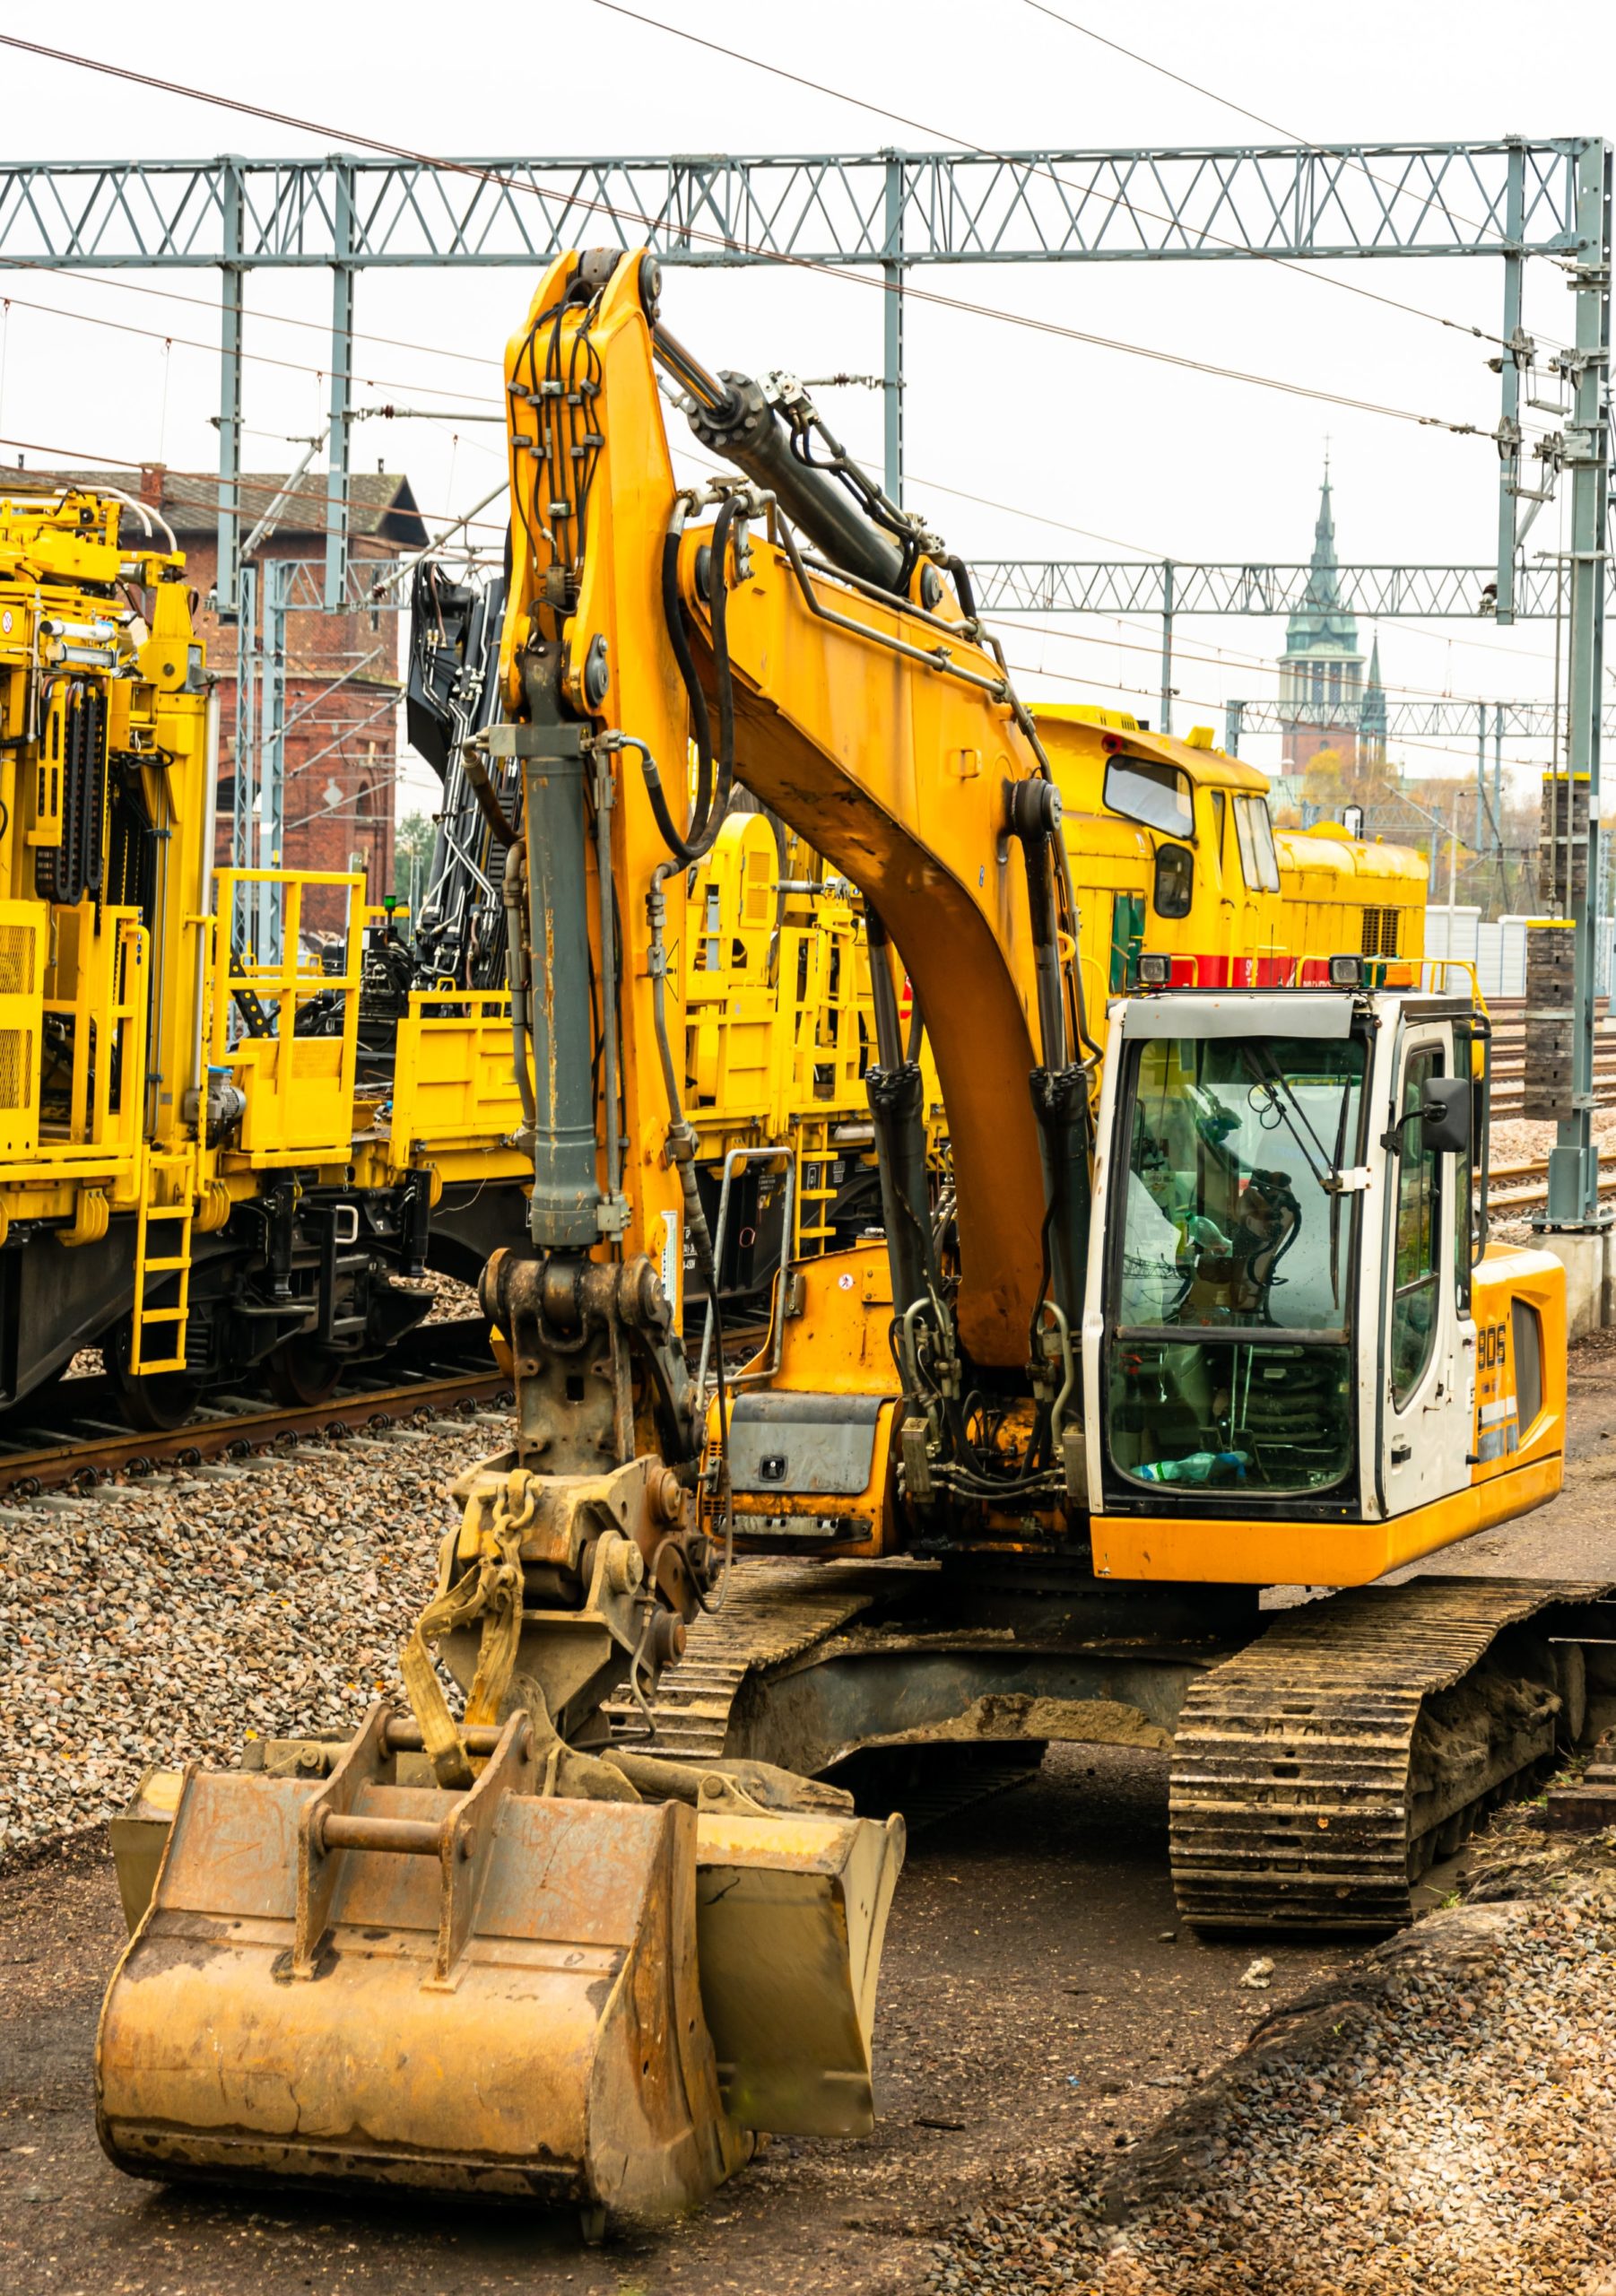
The hydraulic cylinder parts are quite sensitive and must be constantly maintained even if they do not fail. The hydraulic cylinder can be affected by various forms of failure that will result in either a replacement of the parts or just a repair. In each case, how to repair the hydraulic cylinder?

Failures related to the hydraulic cylinder

hydraulic

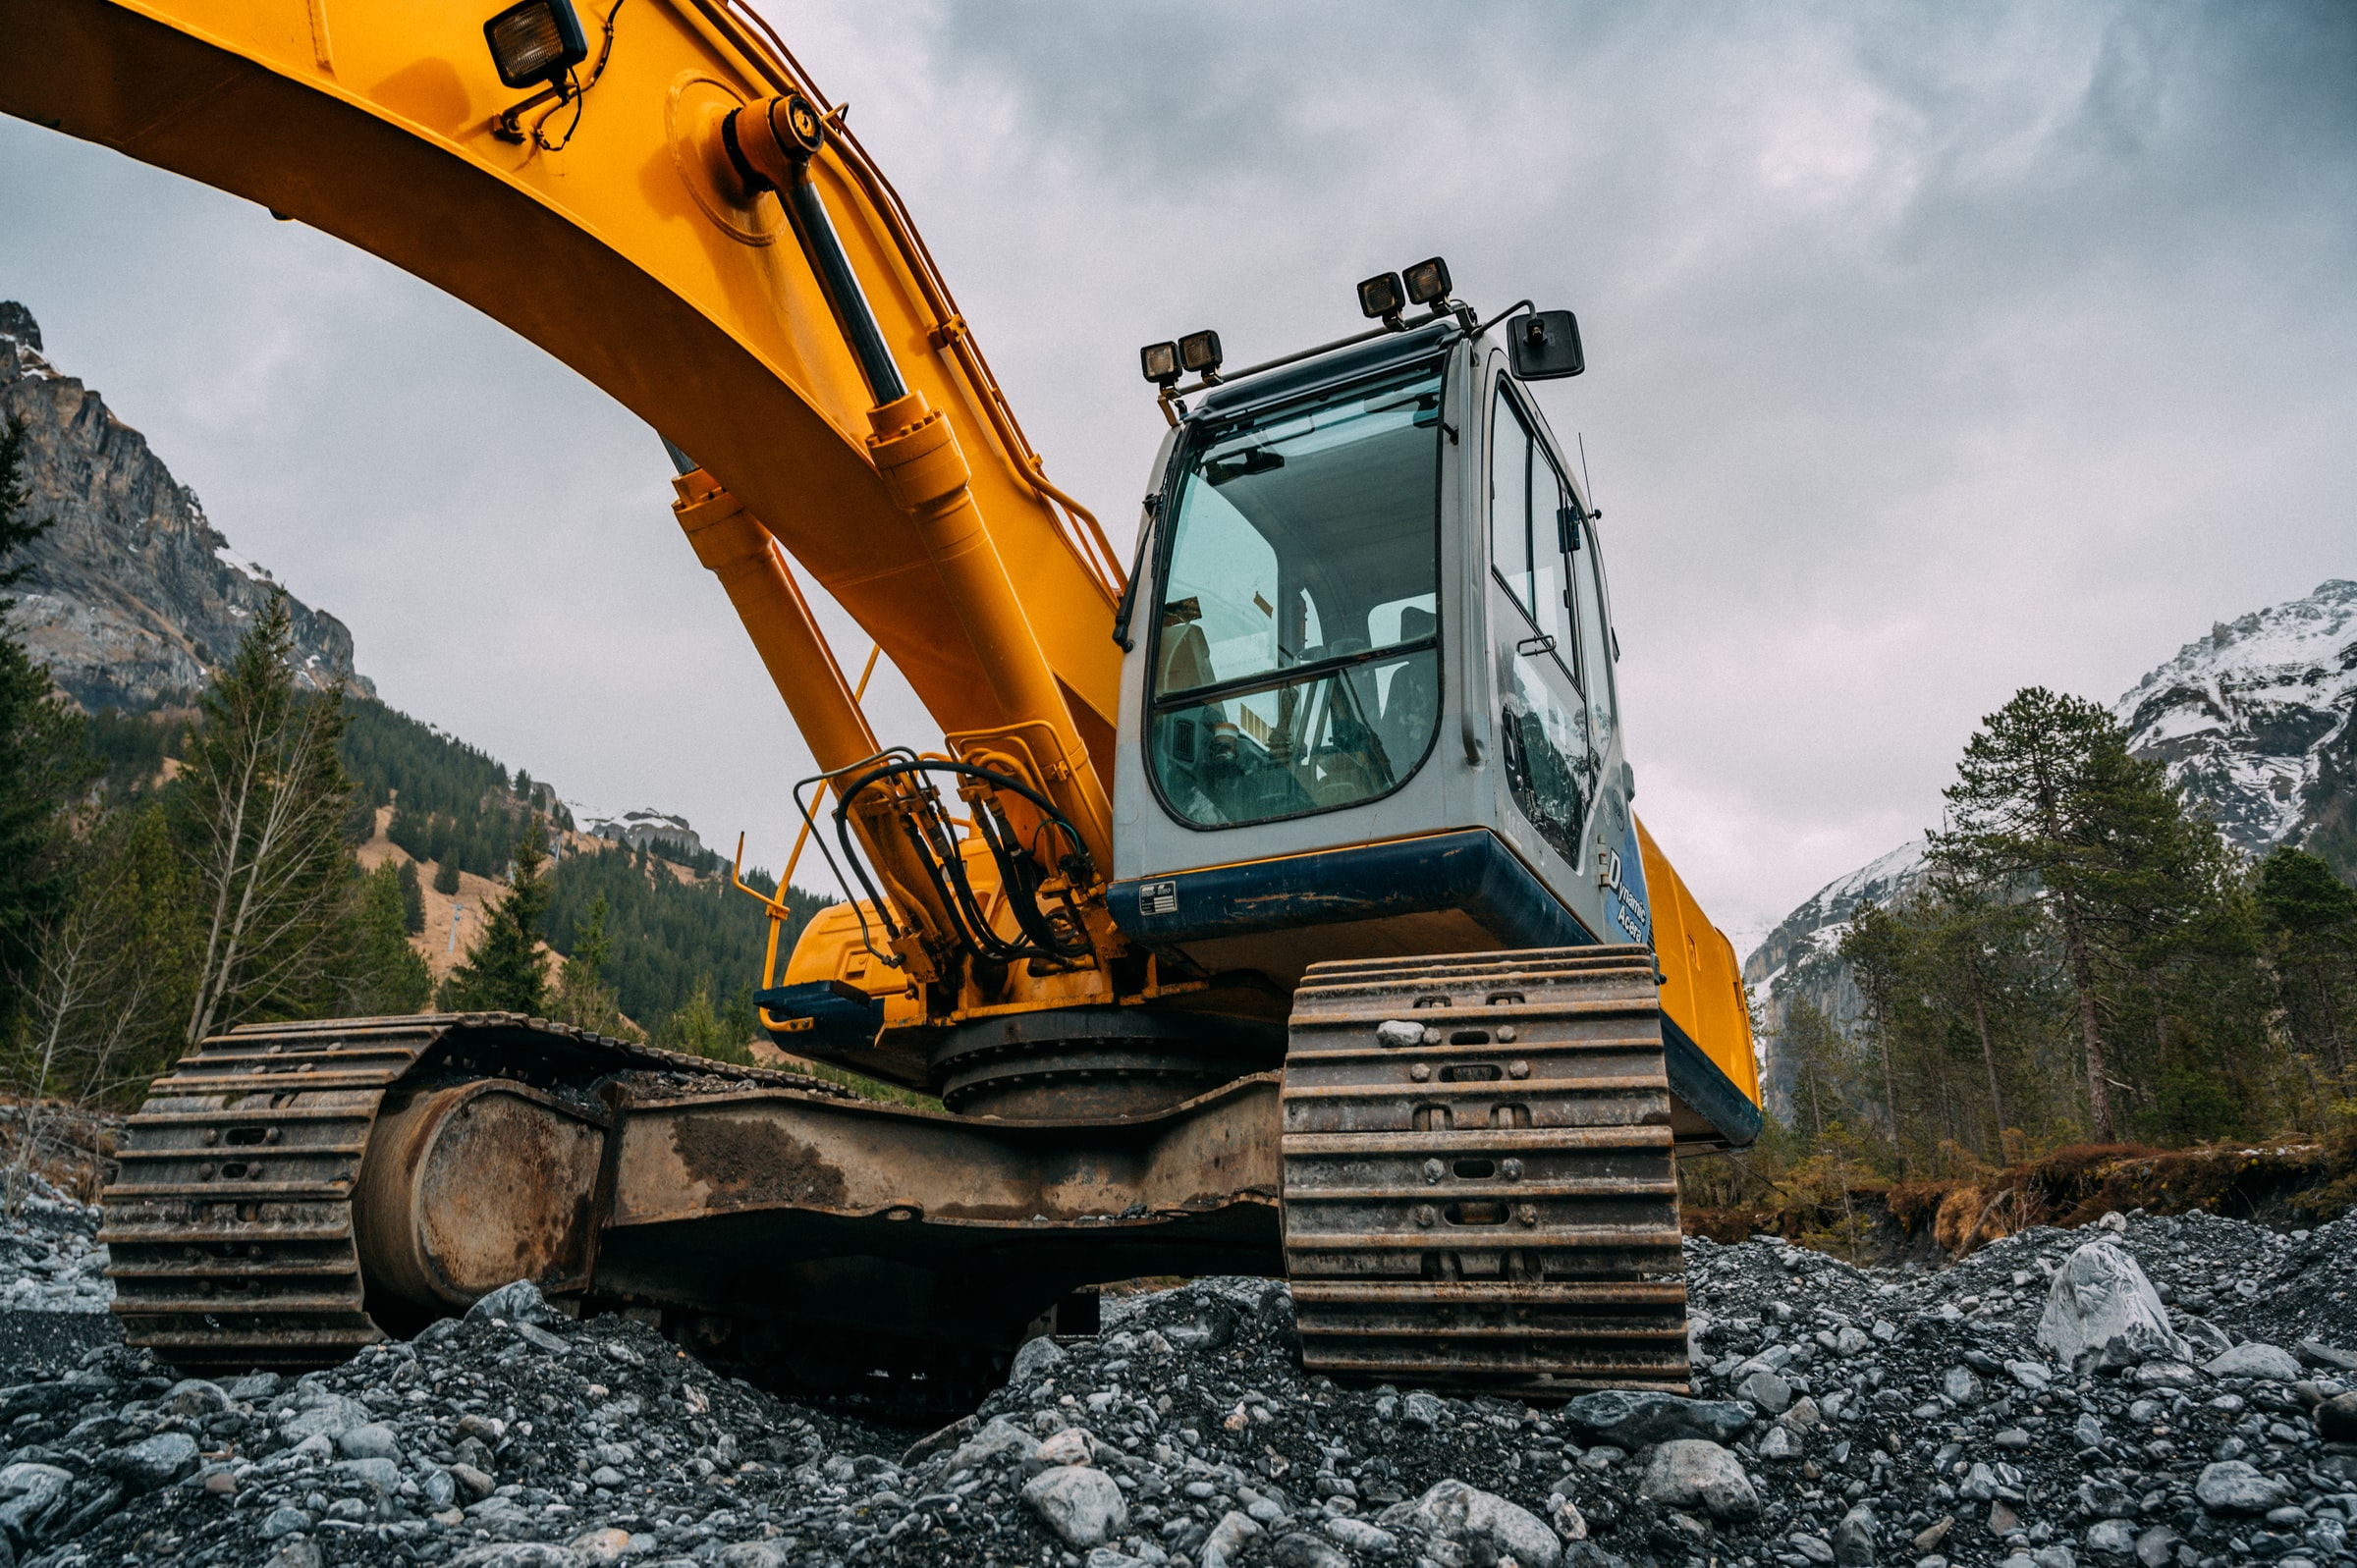
Hydraulic cylinders can be subject to different types of failures. The most common ones are:

  • Twisting of the rod
  • Leakage of the cylinder.

The torsion of the rod

At this level, two solutions are available between replacement and rectification of the positioning. The first solution will consist in replacing the twisted rod. If it is standard, we can order a new one from our supplier or think about a copy to be machined.

The second option is to see how far the positioning can be rectified. This is possible when the torsion is not important. The concept will require the use of parallel lathes and other heavy materials under the expertise of a professional. In both cases, most companies in this industry will be able to restore the machine.

A leaky cylinder

The most common failure related to the cylinder is the leak lets the liquid flow and can be internal or external. The external leak lets us see the liquid which flows. The former is much easier to repair, while the latter is more difficult to notice and detect.

In case of leakage caused by the wear of the cylindrical stem, it will be necessary to think of replacing it or trying to lapping or chrome plating it to smooth the damaged surface. If the seals are worn, the only solution is to replace them so that they can once again effectively inject the pressurized fluid into the hydraulic cylinders.

Routine maintenance check

If the hydraulic cylinder fails or not, a professional will proceed as follows:

Disassembly, rectification, and repair

hydraulic

After the external inspection of the cylinder, it should be disassembled to check each part. The parts are inspected separately to check the internal condition of the device. This dismantling allows for carefully cleaning each part, namely the cylinder, the rod, the ball joints, the seals, etc., and analyzing the origin of the failure if existing.

Replacement of the seals

Hydraulic seals wear out after a while of operation or may be damaged during the disassembly session for routine control. It is, therefore, better to replace these seals at each inspection to avoid possible surprising failures caused by them.

Checking the welds

Sometimes the leakage occurs due to the degradation of the weld. It will be necessary to proceed to grind to remake the tight weld. However, it is recommended to dismantle the cylinder before welding the affected part to avoid further damage. Even for ejection cylinders in molds, the principle remains the same.

What to do in case of scratches on the rod?

If the rod is scratched, there are two solutions. They are, of course, chroming and lapping.

1. Chrome plating of the stem

During the inspection, scratches or any other impact on the stem may occur. If the impact is not important, we can proceed to the matting and polishing of the concerned surface.

If the impact is significant, the rod must be replaced. If the problem is one of the repeated impacts, the specific materials used in construction equipment must be used for the repair.

2. Running-in of the shaft

hydraulic

The shaft can also be affected by scratches. In this case, to avoid a radical replacement, lapping with specific machines is necessary to eliminate the scratches and ensure the sealing of the hydraulic cylinder. For some machines, such as crushing machines, replacement may be expensive.

Sound off in the comments section below and tell us what you want to read next and if you want to read more about the hydraulic cylinder.

leak

How To Fix Leaks In Industrial Facilities?

Industrial plants are often subject to leakage problems in fluid systems. A small leak that is neglected can become the source of a huge loss. Hence the reason to pay close attention and, in case of a leak, to work quickly to solve the leak. How do you manage these famous leaks?

Preliminary actions to be taken

leak

In order to solve a leak in an industrial installation, it is necessary to carry out some preliminary activities. These activities include

  • Detection of the origin of the leak
  • Prioritization of leaks
  • Resorption itself.

Detection of the leak

The detection will consist, first of all, of inspecting the possible fluid leaks thanks to a simple visual check. It can be liquid that oozes out or a plate formation on the floor. Bubble testing is another method of inspecting for possible leakage sources. This method involves the application of a surfactant to the fitting layers to see if bubbles are produced in the event of a leak.

Airborne ultrasonic testing is used on gas piping systems. It uses an airborne ultrasonic measuring device. The methods are innumerable and can be complementary when the leak is difficult to detect. All these tricks are better mastered and are the experts.

Prioritization of leaks

Prioritizing leaks means dealing with the most dangerous leaks before the least important ones. The team cannot deal with all leaks at once. Therefore, it is important to list them in order of importance. Leaks that are considered dangerous are acid leaks and leaks of harmful and accident-prone gases. These leaks should be repaired as a priority.

Solutions to leaks in industrial facilities

leak

After the preliminary actions, the repair can be started according to the different possible solutions. This is the actual repair of the leakage problem.

A leak in a fitting

In case of a leak on a fitting, an anti-leak tape is needed. Simply roll the tape in a spiral, covering half of the previous layer with each turn. The tape should extend 5 cm beyond the exact location of the leak. This technique is most effective when the leak is in a pipe or in a defective weld.

It is true that the nature of the intervention will depend in part on the different types of industries that have recorded the leaks concerned, but home-made tricks are not negligible. In this situation, the leak can also be sealed with leak-proof sealant. This product is very appreciated for its resistance to high temperatures. It works on many materials, as does the anti-leak tape.

A copper pipe leak

With a copper pipe, sealing is fairly simple and involves two possibilities. The first possibility is to seal the leak with rubber and a hose clamp. The second possibility is to use a piece of soft plastic instead of rubber at the leak and try to hold it in place with the clamp.

What to do after the emergency intervention?

leak

To avoid possible occupational hazards, most of the work should be done by experts. The methods available to everyone will only serve to delay damage and save fluid. If you are not experienced, there is a greater risk of aggravating the leak.

The installations must be well done so that they remain watertight for a very long time. It will still be necessary to choose the right expert in repairing various leakage problems in industrial facilities. This applies right from the selection of the industrial building construction professional in question.

Sound off in the comments section below and tell us what you want to read next and if you want to read more about industrial pollution.

solar

Top 4 Things Everyone Should Know About Solar Panels

We only have one planet, and we need to start acting as such by adopting a more eco-friendly way of life. This is buying solar panels and installing them on your own is environmentally friendly and is good for the environment. This is a win-win situation if you ask us. So, without further ado, let’s dive into this blog and learn more about solar panels.

1. How do solar panels work? 

solar

This is one of the first questions you might ask yourself if you want to invest in a photovoltaic system. A photovoltaic system consists of the following elements:

  • Solar panels, which are themselves made up of photovoltaic cells
  • A fixing system
  • A charge controller
  • An inverter that allows the transformation of direct current into alternating current
  • Wiring
  • A production meter
  • A consumption meter
  • A supervision system
  • A circuit breaker.

The photovoltaic cell is the centerpiece of a photovoltaic system. The modules are made of these cells and then assembled into panels. Silicon is the material that allows the photovoltaic effect to occur. It is a semi-conductor compound that creates an electric current when in contact with sunlight. To be more precise, a cell is composed of two layers of silicon, one positively charged and the other negatively, like an electric battery.

The sun’s rays, and more specifically the photons, pass through the photovoltaic cell. They create a hole in the upper (negative) layer and generate an electrical voltage with the lower (positive) layer. The generated current is transformed into alternating current thanks to the inverter in order to supply the equipment of a house or a building.

2. Price

Since electricity tariffs are constantly increasing and feed-in tariffs are decreasing, connections to the grid for total sale installations are likely to decrease to the benefit of self-consumption photovoltaic connections.

Until 2017, individuals who would integrate solar panels into their roofs benefited from a better feed-in tariff for their electricity. The price per kWh was set at 0.46$ for installations with 9 kWh or less power. Thus, the feed-in tariff of electricity has decreased by 65%. 

 Many households make a choice to make the total sale of their electricity. Depending on your consumption habits, the characteristics of your roof, or your budget, this solution can be more profitable for you if you are in a lucrative and eco-responsible approach. 

3. Return on investment

solar

The price of a solar panel installation is often one of the main reasons for the reluctance to take the plunge into photovoltaics. However, the profitability of an installation is no longer in question. The fall in prices in photovoltaics and the increase in electricity tariffs make photovoltaics and, in particular, self-consumption more and more interesting financially.

An installation costs between 2,200 and 2,800 dollars per kWp and generates significant reductions in electricity bills each year. Either directly through self-consumption or indirectly through the sale of the production to an electricity supplier.

State aid for the installation of photovoltaic panels, such as the self-consumption bonus or the EDF OA feed-in tariffs fixed over 20 years, further improve the profitability of solar panels. Depending on the geographical area and the solar installation cost, the return on investment is reached between 10 and 15 years.

4. A civic gesture 

Today, it is difficult for government representatives to adopt (at least publicly) a position that would not be favorable to the energy transition in the United States. Nuclear power is the object of all the wrath; renewable energies have the wind in their sails. In 2020, they will account for 19.1% of the US’s gross final energy consumption, of which 3.4% will be produced by photovoltaic solar energy.

The 2015 law on energy transition for green growth aims to raise the percentage of renewable energy in the US energy mix to 32% by 2030, which is 5% higher than the European aspirations for the same date. Thus, by installing solar panels on your house, beyond your personal convictions, you are taking a resolutely civic approach through your contribution to greening the US public electricity network.

Final thought

solar

Are you in Campbellfield? Are you looking into buying a solar panel? Then look no further than Battery Shop. With over 2 decades of experience, they pride themselves in being the premier one-stop-shop for all your battery needs in Campbellfield. They provide a wide range of services from batteries to solar panels and accessories across Victoria.

So, what are you waiting for? Give them a call to learn more about their services. Using solar energy saves you money on your electricity bills and is also environmentally friendly. So let’s take steps in the right direction and make a difference for our planet.

insulation

Cellulose Wadding: An Ecological Insulation

In terms of ecological insulation, cellulose wadding is very popular. It has intrinsic qualities to improve and maintain a house’s thermal and phonic comfort. To learn more about this type of insulation, read the following article!

Composition

insulation

Often known as “cellulose insulation”, cellulose wadding is composed of :

  • 15% minerals
  • 85% recycled newspapers or cardboard: the coated paper should be avoided. Indeed, it is too crushed to insulate and trap air. In order to provide excellent insulating performance, the paper or cardboard is mixed with additives during shredding.

Ammonium polyphosphate

According to popular belief, “the use of boron in insulation classified as ecological did not fit the image. As a result, manufacturers looked for new alternatives and turned to ammonium polyphosphate, a substitute additive. However, this emits a strong ammonia odor that can exceed the authorized thresholds. Realizing this inconvenience and the proven health risk, the CSTB and the CCFAT have re-authorized the use of boron salt.

Boron salt

Although it presents risks of nephrotoxicity, it is the traditional additive used to manufacture cellulose wadding. It is widely used because it is a flame retardant. It is also bio-soluble, bactericidal, non-volatile, and hygroscopic. Boron salt is classified in the “Reach Directive” through its qualities that can present health risks. This directive determines the classes of use of boron salt and the authorized doses (5.5% maximum).

Manufacturing

Here is the process of this manufacture:

  • The pre-crushing or pre-crushing of the blocks of newspapers via a machine of the same title as the crushers of pebbles. It consists of reducing these last insufficiently small blocks to introduce them in one of these mills: hammers, centrifuges, or plates.
  • The pulverization of paper by hitting it with sledgehammers.

Cellulose wadding is an insulating material obtained from paper recycling (waste from new paper cuts from printing companies, newspapers, books, etc.). The process consists of grinding the recovered paper to obtain cellulose fibers. These are then mixed with water. We obtain a diluted paste which will be mixed with treatment products. Then, this paste is spread on a large canvas. The use of these products allows the wadding to resist rodents, insects, and mold.

Characteristics

insulation

Cellulose wadding is available in bulk, in panels, or in bottles. It has many qualities. It is a material that is:

  • Environmentally friendly
  • Healthy
  • Natural, ecological and renewable

It allows for efficient thermal and acoustic insulation. There are 3 types

Cellulose wadding insulation:

  • Insulation by blowing in the roof
  • Insulation by blowing in a wooden frame wall
  • Blown-in insulation of lost attic space

If you wish to have comfort in terms of insulation, call upon a company specialized in the use of cellulose wadding.

Price

The cost of installing cellulose wadding varies depending on :

  • The craftsman who takes care of all the work
  • The workmanship
  • The support to be insulated
  • The accessibility of the room to be insulated
  • The type of cellulose wadding and the desired thickness
  • The method used

In general, the price per square meter is between 25 dollars and 35 dollars. For insulation by :

Insulation:

insulation

  • For wood-frame wall, the rate is between 20 dollars to 30 dollars per m²
  • On the roof, it is necessary to foresee between 30 dollars to 35 dollars for the m², and blowing off the lost attic, the price is between 25 dollars and 30 dollars per m².

We only have one Earth, and this is why we need to take care of it and treat it like the only home it is. This is why more and more of us are going and leaning into more ecological ways of building. Sound off in the comments section below and tell us what you want to read next.

lightning

Everything You Need To Know About Lightning Conductor Installation

Lightning rods are highly recommended for people living in mountainous regions or cities with skyscrapers. It will help you to keep your appliances away from danger. Indeed, this tool allows you to protect your homes in case of a lightning strike.

In this article, we tell you everything about lightning rods in order to protect you from these unavoidable weather hazards.

What is a lightning rod?

lightning

Benjamin Franklin invented the first lightning rod system in the 18th century thanks to a study he made with a kite and the electrical nature of lightning. Indeed, thanks to this study, he was able to implement a device to protect buildings. That, by redirecting directly into the ground, the electricity is discharged during times of storms.

How does a lightning conductor work?

The principle of operation of a lightning conductor is to encourage the lightning to come down on him rather than on the building or elsewhere. To do this, a lightning conductor is mainly composed of a rod placed on a high point. This rod is then connected to the ground by down conductors (metal cables) in order to direct the discharged electricity directly into the ground.

In addition, for the proper functioning of the lightning capture device, the lightning conductor is also made up of grounding conductors connected to each other by metallic grounds.

The different types of lightning conductors

Several types of lightning conductors differ from each other on the market, depending on their usefulness and level of complexity.

1. The lightning conductor with a “simple rod.”

The PTS is composed of a metal tip that can go up to 8 meters high in order to encompass the entire structure to be protected. It is connected to two copper down conductors, which are then connected to earth connections. It can provide protection over a radius of approximately 30 meters. However, it is strictly reserved for the protection of small structures.

2. The “enameled cage.”

lightning

The “enameled cage” lightning conductor is composed of a mesh covering the whole structure to be protected. For this purpose, numerous spikes are positioned on the roof, with meshes ranging from 5 to 20 meters long, depending on the level of protection required.

This type of lightning conductor requires a rather high installation cost and is rather reserved for complex buildings.

3. The lightning conductor with “priming device.”

The PDA creates a privileged point of impact on its tip with the help of an ionization device. It is capable of capturing lightning strikes more quickly than a PTS. Moreover, it can also offer a more expansive protection zone (about 120 m). This allows it to protect large structures.

The installation of this type of lightning conductor is inexpensive, despite the fact that it can protect both the building and its surroundings.

Is the installation of a lightning rod mandatory?

Generally, the usefulness of installing a lightning conductor will be determined mainly by the geographical location of your home. Obviously, storms are more prevalent in mountainous regions than elsewhere.

Nevertheless, if you have the means, nothing prevents you from installing this protection device, even if you are located in a region that is not very affected by lightning strikes.

Procedure for installing a lightning conductor

lightning

This lightning protection device can easily be found in stores. However, the installation of a lightning conductor always requires the intervention of a professional. Indeed, the lightning conductor, placed at the top of your house, must respect strict characteristics, including:

  • The position of the tip must be above the highest point.
  • The resistance of the earth connection must be at the lowest level.
  • The cable connecting the lightning conductor to the ground must be short and direct. It must be separated from any other type of pipe (gas, water…)

Sound off in the comments section below and tell us what you want to read next.

Creative Ideas To Reuse, Reduce And Recycle Old Clothes (Part 2)

Every season, you want to follow new fashions, and it is good that you shop because you stimulate the economy and business. But you also have to encourage ourselves to recycle clothes since it is another good alternative to preserve the environment. Six million tonnes of clothing are thrown away in Europe every year, of which only 25 percent are recycled, 2700 liters of water are needed to make a 250-gram cotton T-shirt. It’s therefore important to reuse clothes and buy ecological fabrics. But surely the question you ask yourself is how to recycle old clothes. Let’s check out some savvy ways to reuse old clothes!

#1. Spice Up Your T-Shirts

sew

You are probably just bored with some of your clothes and want to give them a more modern touch. Do you want to know how? It is very simple! You just need scissors and a little imagination. Fold a basic shirt in half but over the longest part of the garment. Then mark the drawing you are going to make and prepare to cut out. The truth is that you can innovate with hundreds of spectacular designs like this one that we show you.

#2. Make Chews For Your Dog By Reusing Old Towels, Socks, And Other Clothes

Even older garments can offer a second utility before being thrown away. Reusing old towels, socks, or jeans to make teethers for your pets is clear proof of this. In this case, you will always try to use cotton garments as raw material. 

#3. Make Baby Bibs From Used Clothing

Bibs are handy to prevent your babies from staining their clothes. They are garments that are designed to get dirty and wash continuously. If you have fabrics prepared for humidity, such as those used to make technical clothing, raincoats, or swimsuits, you can easily recycle them into long-suffering bibs. 

#4. Recycle The Sleeves Of A Sweater To Make Fingerless Gloves

One of the easiest clothing recycling projects is to cut the sleeves from an old sweater or shirt to make fingerless mittens or gloves. An ideal complement to be able to use your mobile phone in winter without your hands freezing. 

#5. Make A Case For Your Mobile Phone Or Sunglasses

Another good idea to recycle a shirt, sweater, or coat sleeves is to use them to make a protective cover for your mobile phone or shades. This way, you will avoid being rub against other objects when you carry them in the bag. 

#6. Use The Fabric Of Clothing That You Do Not Use To Upholster Chairs And Other Furniture

Using the fabric of your old clothes to upholster your furniture, you will be able to extend the life of the fabrics and add a touch of color to your home. 

#7. Using Denim To Make A Tool Holder Apron

If you like to do DIY projects beyond sewing, a tool holder apron may be handy. The back of some old jeans can provide us with a resistant fabric that you can use as raw material. 

#8. Make Some Slippers From An Old Sweater

If you have a thick wool sweater, you can make some warm slippers to walk around the house. Searching the net a bit, you will find many websites that offer us free patterns that you can use as a model to make them. 

#9. Make A Wall Organizer Out Of Pockets From Old Jeans

Our old jeans’ back pockets can help us keep order in your home if you use them to make organizers, which you can hang on the wall or inside your closets. 

#10. Make Cleaning Cloths From Cotton Garments

Perhaps the easiest way to reuse your old clothes is to recycle them as cleaning cloths. You must always use fabrics made with natural fibers such as cotton since synthetic fibers can scratch glass and other materials.

What do you think of this topic? Have you already recycled any garment? Check out the first part of this article to learn more savvy ways to reuse your old clothes!

Creative Ideas To Reuse, Reduce And Recycle Old Clothes (Part 1)

Who hasn’t had one or more used clothes in the closet that are still there, even if you never use them? A little for being fond of it, a little for feeling guilty for putting it only once… It sure sounds familiar! Getting rid of used clothing is not easy, especially if the only alternative is to throw it away. In this post, you want to help you get those clothes that you no longer use out of the closet and give them a second chance. If with that gesture you can make more than one person happy, what are you waiting for?

#1. Make A Top From A T-Shirt, Shirt, Or Sweater

Applying the previous concept to your t-shirts, shirts, or sweaters can also cut them to reuse them as perfect tops for the hottest days. 

#2. Recycle An Old Dress Into A Skirt

Indeed sometimes, you will have discarded a dress because it was beginning to look old at the top, but some part of it was still perfect. With a couple of cuts and a few stitches, you can turn your old dresses into new skirts.  

#3. Use A Man’s Shirt To Make A Girl’s Dress

A men’s shirt with a worn or torn area can be the perfect candidate to become a children’s dress. As they are very different sizes, you will have plenty of fabric to elaborate modifications and add ornaments, pockets, and other accessories. 

#4. Make Cushions With Garments That You No Longer Use

The fabric of the clothes you no longer use is ideal for transforming it into other garments and other textile objects, such as fantastic cushions. You can use the most colorful to make the cushion covers and those older or a little uglier fabrics to use as fillers. 

#5. Toys And Stuffed Animals For The Little Ones Made From Recycled Clothes

If you have some basic sewing knowledge, you can unleash your creativity to create toys and stuffed animals from the clothes you no longer use. So you can use even the smallest remnants. 

#6. Make A Cloth Bag From T-Shirts, Shirts, Or Dresses

The best-preserved parts of your shirts, T-shirts, and dresses can be used as material for making cloth shopping bags or bags to store bread.

#7. Use Scraps Of Old Clothes To Personalize Other Clothes

Maybe you have a dress, shirt, or garment that you love its texture, color, or pattern. If you do not want to discard it completely, you can always use a remnant of this garment to customize another that you do wear. You can do it by adding sewing patterns, adding pockets, bows, ornaments, etc. 

#8. Make A Quilt Or Patchwork Blanket

If you like to sew, patchwork can be an excellent way to have a good time protecting the environment. You can combine scraps taken from different clothes and fabrics and make perfect blankets and quilts for winter. 

#9. Use Umbrella Cloth To Make A Waterproof Apron

When an umbrella breaks down, and you can no longer use it to protect yourself from the rain, the most common is that it is because one or more rods have been broken. However, the fabric tends to remain in good condition, and being waterproof, it is ideal for making an apron for painting or use in the kitchen. 

#10. Reuse Used Clothing Fabric To Make A Pet Bed

Our best friends also deserve a good rest from time to time. Your old bedding can be perfect for getting the raw material you need to make a pet mattress

Want to learn more whip-smart ways to recycle old clothes? Check out the second part of this article here!